Quick start with Visual scripting
QTrobot Studio is a browser-based, block programming environment that lets non-technical users build and run programs on QTrobot by snapping graphical blocks together — no coding required. It runs directly on QTrobot's QTPC; no cloud account or internet connection is needed.
If you prefer coding (Python, TypeScript, or ROS2), see Quick start with coding instead.
What can you build?
With QTrobot Studio you can program QTrobot to:
- Speak in multiple languages with configurable voice, speed, and TTS engine
- Show facial expressions and emotions
- Play gestures from the built-in library or from gestures you record yourself
- Present images and interactive clickable visuals to a learner through the Learner App
- Play custom audio files
- Create branching Q&A sessions with the Select block
1. Turn QTrobot on
Place QTrobot on a stable surface. To turn it on, plug in its power supply. QTrobot is ready in under a minute: the face lights up and the motors move to their home position.
To turn QTrobot off, press the power button on the back. Wait for the face screen (which turns blue before shutting down) to go off completely, then unplug the power supply.
Only use the power supply provided with your QTrobot. Always unplug QTrobot when it is off.
2. Access QTrobot Studio
QTrobot Studio is served at port 80 on QTPC. How you reach it depends on your setup:
On QTPC directly
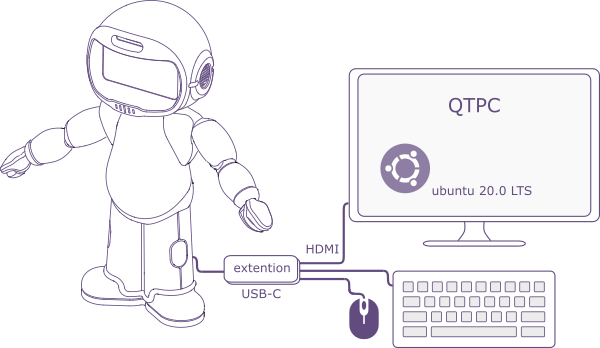
First, connect a keyboard, mouse, and monitor to QTrobot:
a keyboard,
a mouse,
and a monitor with an HDMI/DisplayPort cable.
If your QTrobot has a USB-C port, use the provided USB-C extension hub; if it has standard USB and DisplayPort, use the provided DisplayPort-to-HDMI cable for the monitor and the USB ports for the keyboard and mouse.
Once the Ubuntu desktop is visible, open a browser and navigate to:
http://127.0.0.1
From a laptop, tablet, or phone — hotspot mode
If QTPC is not connected to a Wi-Fi router, it automatically starts a local hotspot:
| Network name (SSID) | qtpc-qtrd000123 where qtrd000123 is your robot's serial number |
| Password | 123456789 |
Connect your device to that network, then open a browser and navigate to:
http://10.42.0.1
From a laptop, tablet, or phone — router mode
If QTPC is already connected to your Wi-Fi router, find its IP address on that network. On QTPC:
- Click the network icon in the top-right corner of the Ubuntu desktop and note the IPv4 address shown, or
- Open a terminal and run
hostname -I— the first address listed is the one to use.
Then navigate to that address from your device's browser (for example, http://192.168.1.42).
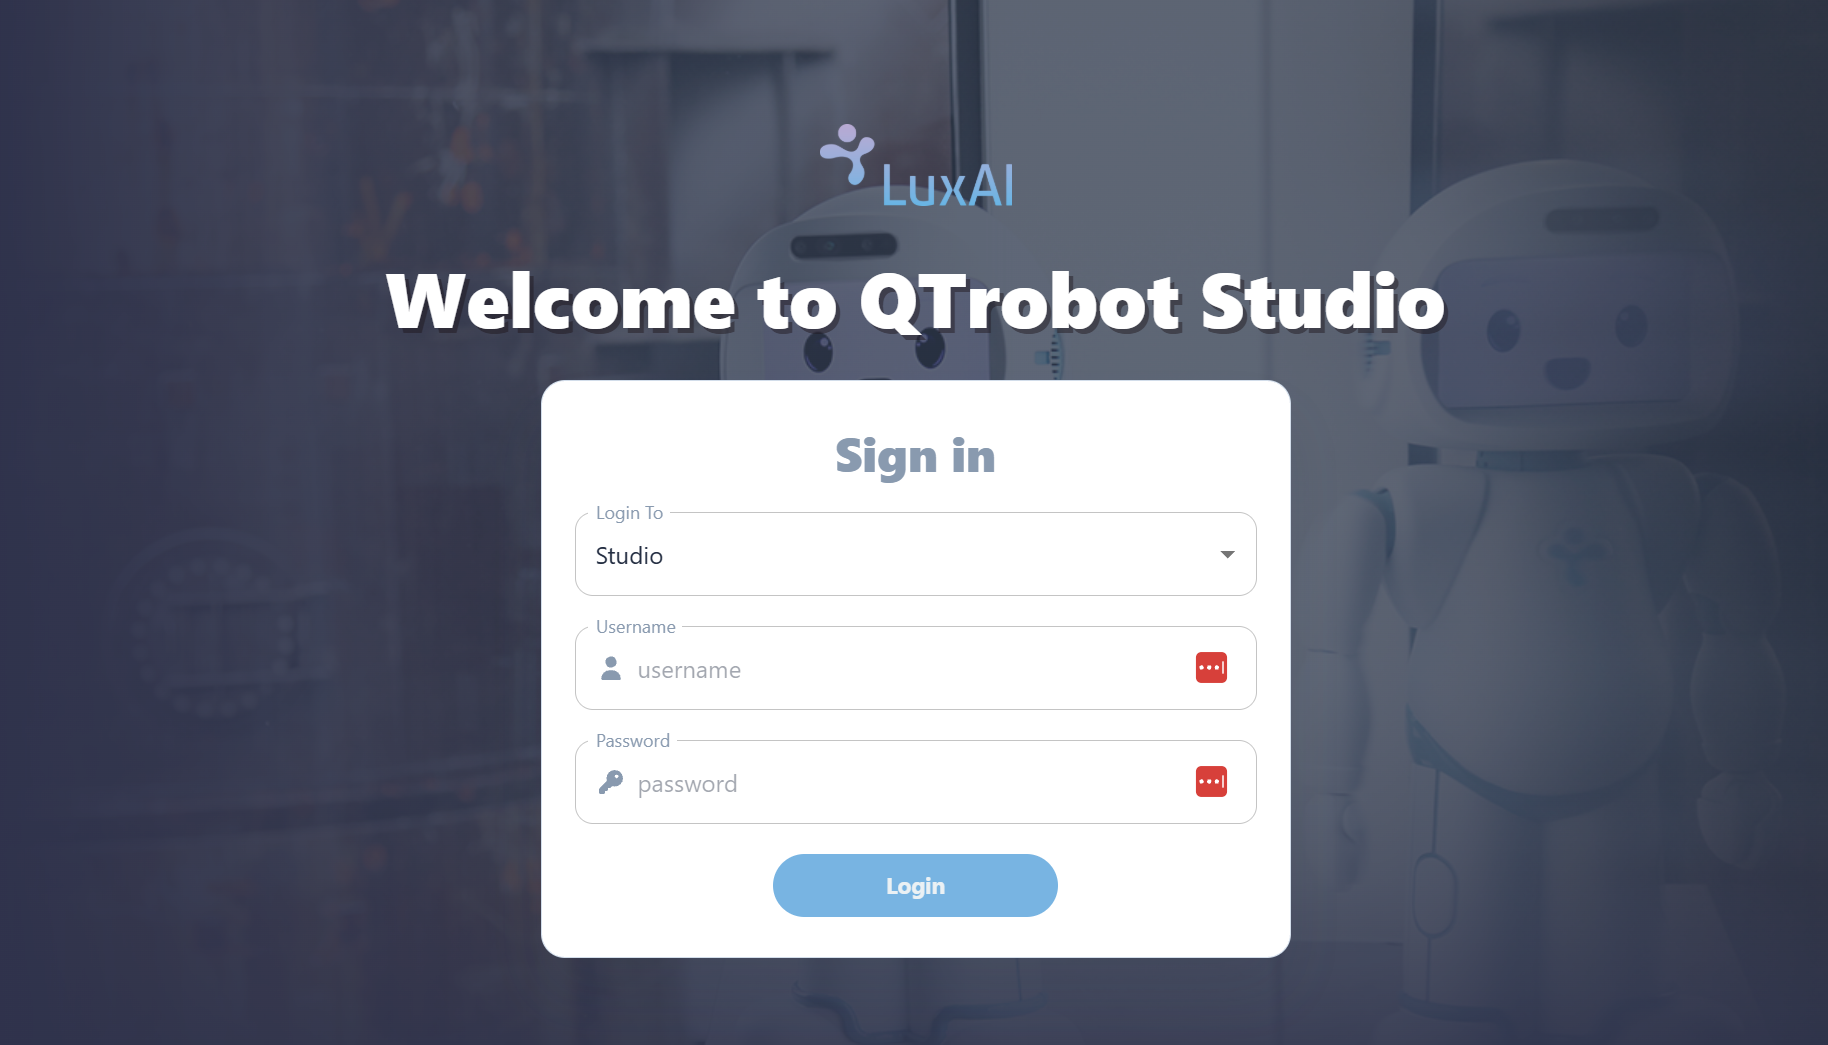
3. Log in to Studio
At the login page, select Studio from the "Login To" dropdown, then enter:
- Username:
admin - Password:
admin
4. The Studio interface
After logging in, you see the main block programming workspace:
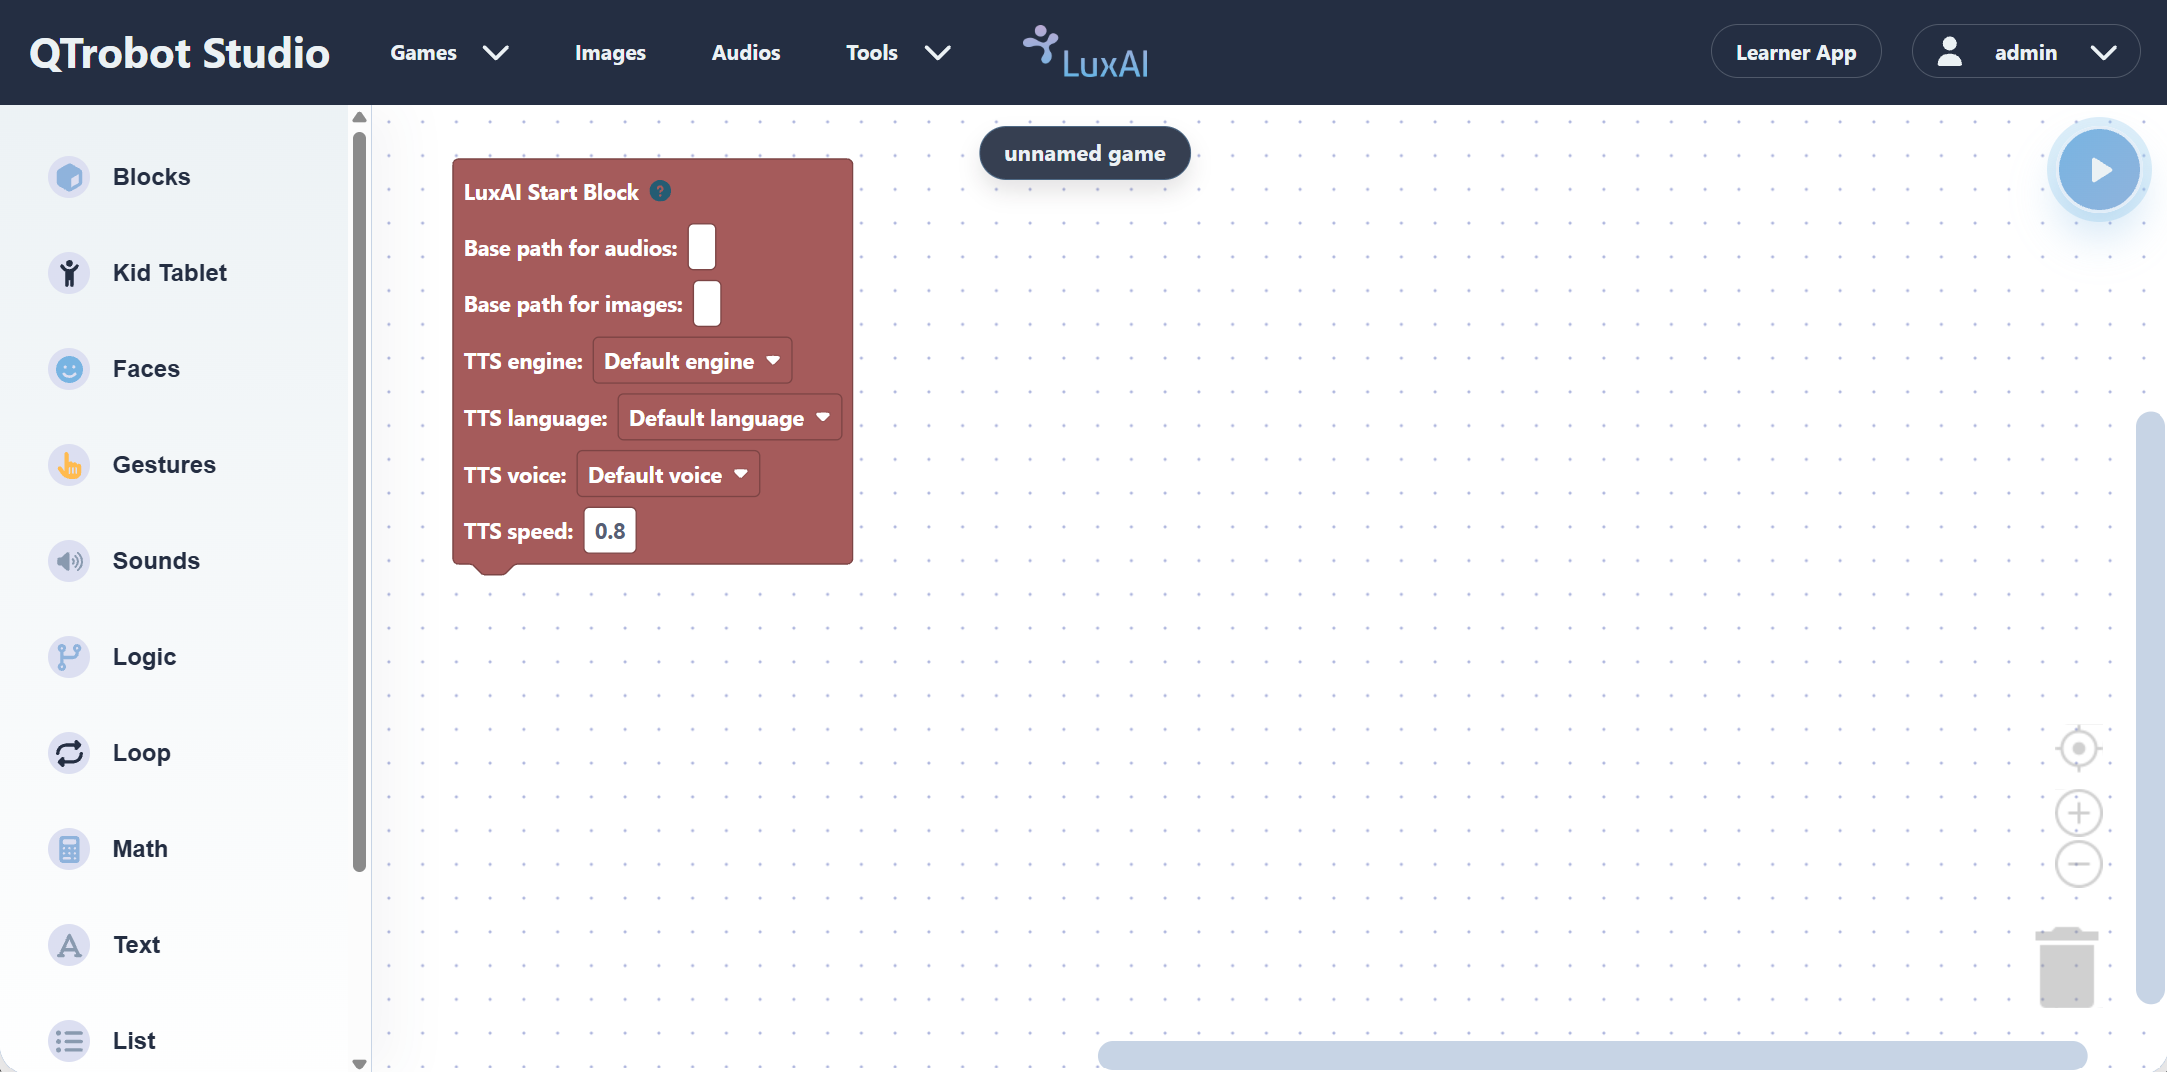
| Area | Description |
|---|---|
| Left panel | Block categories: LuxAI Blocks, Kid Tablet, Faces, Gestures, Sounds, Logic, Loop, Math, Text, List |
| Canvas | The programming workspace; drag and connect blocks here to build your game |
| Top menu | Games (create, open, save, delete), Images, Audios, Tools (gesture recorder) |
| Play button (top-right, blue) | Runs the current game on QTrobot |
| Learner App (top-right) | Opens the Learner App in a new browser tab |
| admin menu (top-right) | Account settings and sign out |
All your games, uploaded images, and audio files are stored locally on QTPC. Nothing is sent to external servers.
You are ready to start programming. Head over to the Tutorials to keep going.