Quick start with coding on QTrobot V3
This document guides you towards quick start coding on the QTrobot v3 using programming languages. If you are looking for graphical programming, please take a look at Quick start with QTrobot studio.
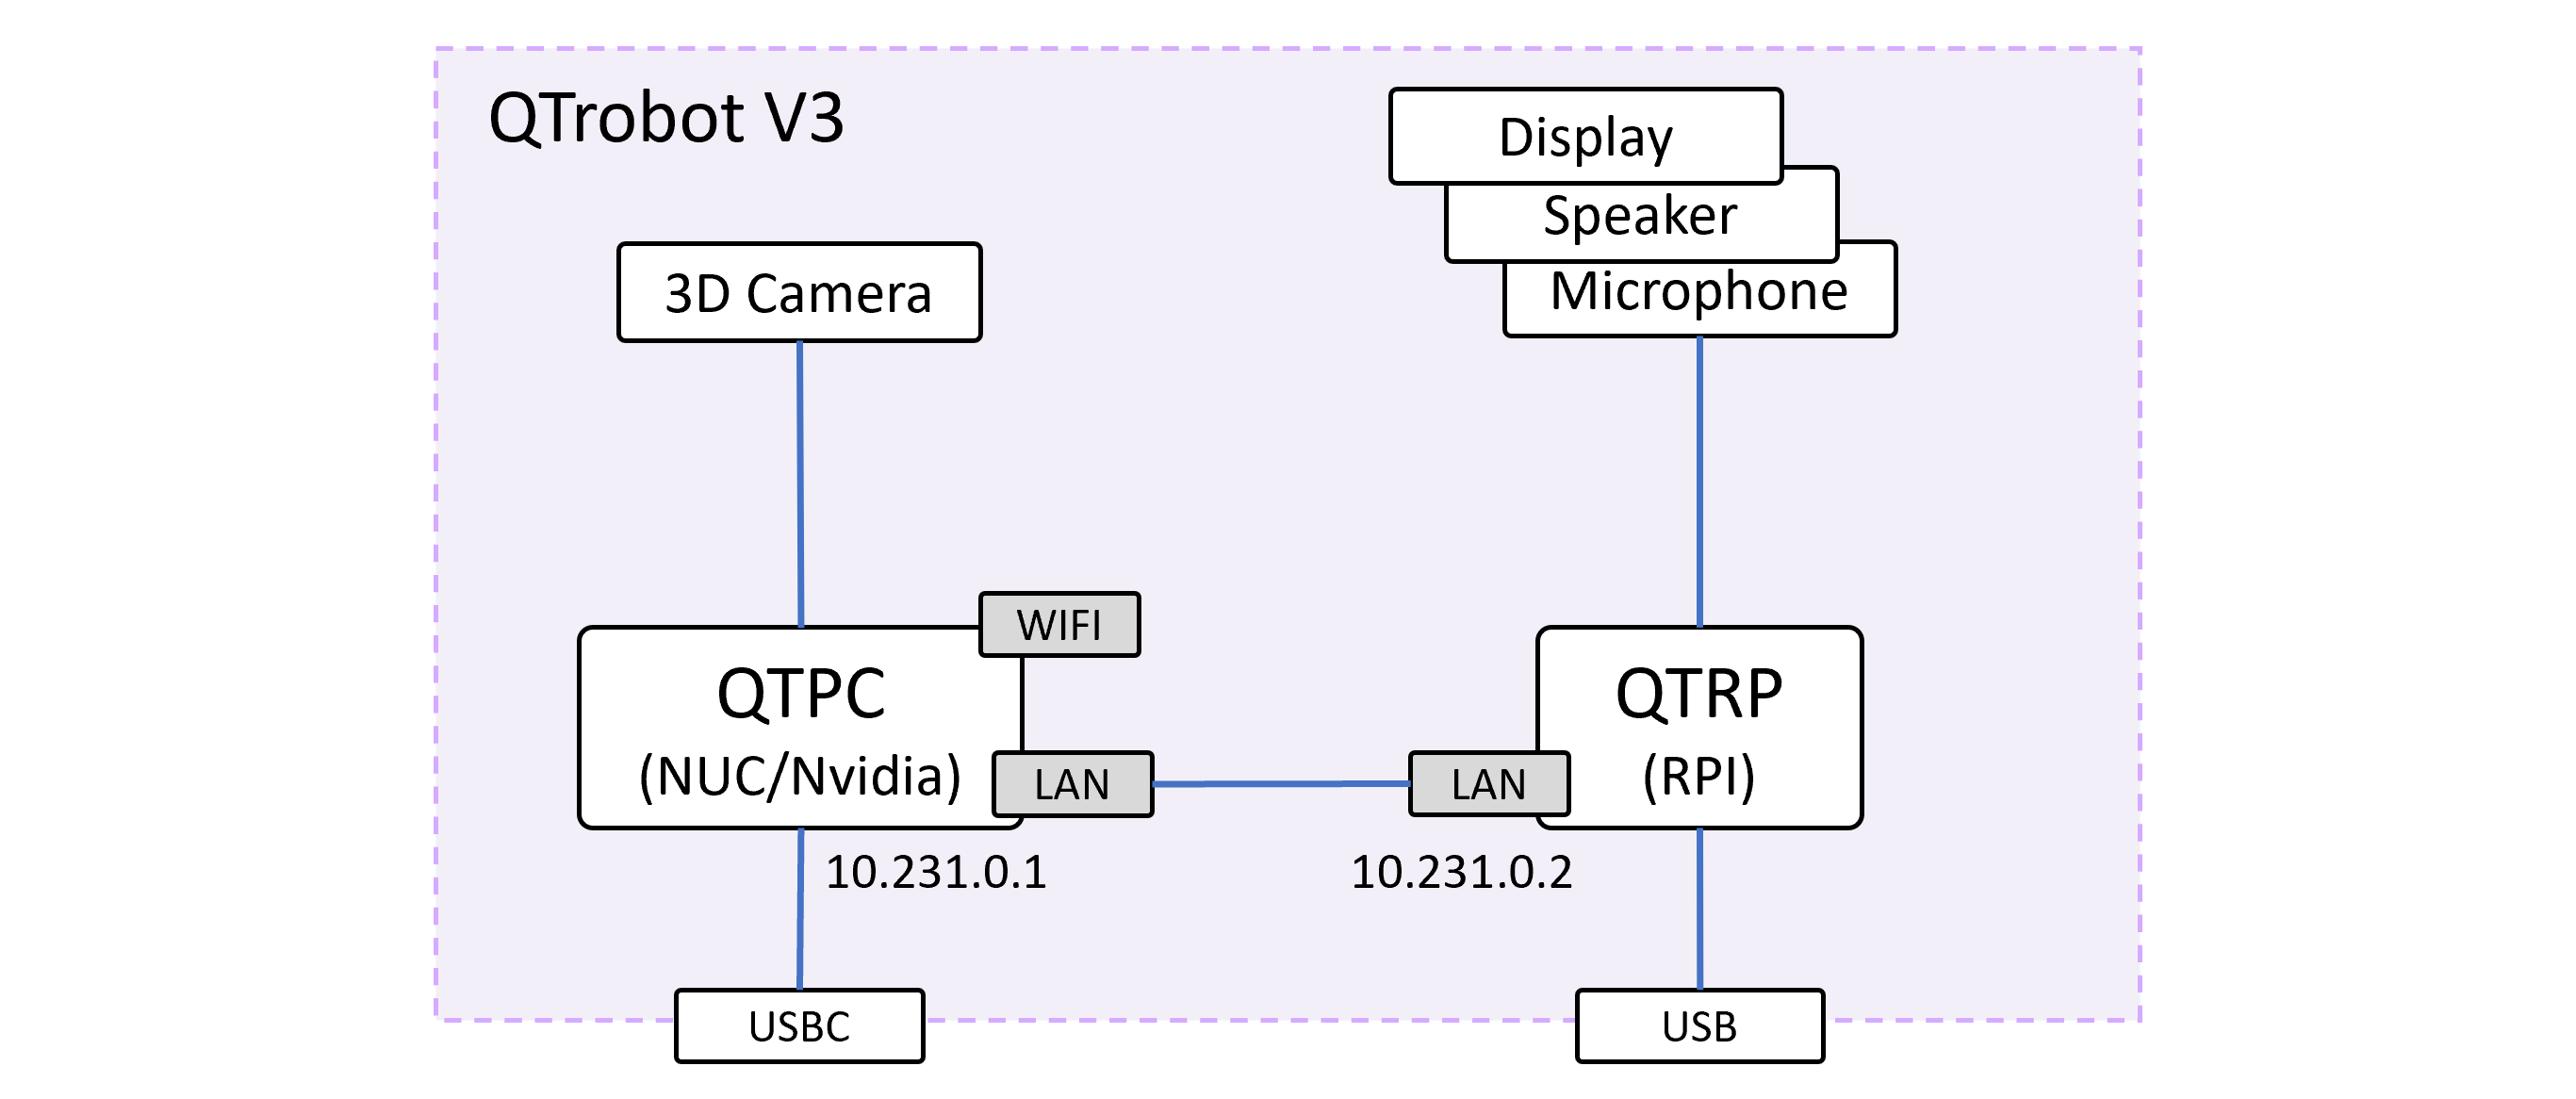
QTrobot is built around two onboard computers connected over an internal ethernet link: QTRP (Raspberry Pi based), which drives the face, speakers, microphone array and motors, and QTPC (an Intel® NUC or Nvidia Jetson), which provides the bulk of the computing power for your applications. It also includes a 3D camera and the usual USB-C/USB expansion for keyboard, mouse and monitor.
What's new in QTrobot V3 is the software stack running on top of that hardware:
-
Refreshed operating systems, all moved to current long-term-support releases:
- QTPC (NUC) → Ubuntu 24.04 LTS
- QTPC (Jetson) → JetPack 7.2 (Ubuntu 24.04 based)
- QTRP → Debian GNU/Linux 13 "trixie" for Raspberry Pi
Across all of them, this brings Python 3.12.3 as the system Python.
-
A new software architecture. QTrobot no longer requires ROS as its core middleware. Instead, it's built on the powerful Magpie, a lightweight, transport-agnostic pub/sub and RPC layer, with a set of gateways that expose the robot over ZMQ, MQTT, WebRTC or ROS2, whichever fits your setup. On top of that, LuxAI provides official Python and TypeScript/Node.js SDKs, plus first-class ROS2 support for teams that prefer to stay in a ROS-based stack.
-
Always up to date. Every QTrobot software component, including the service hub, the gateways and drivers, is now distributed as a regular package and kept current with a plain
apt update && apt upgrade, on QTRP and on QTPC (both NUC and Jetson variants).
Prepare your setup
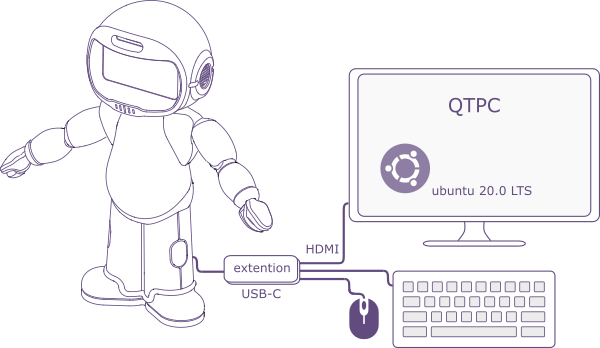
There are a few ways to develop code for QTrobot. We strongly recommend starting directly on QTrobot's integrated QTPC. As shown below, you'll need:
a keyboard,
a mouse,
and a monitor with an HDMI/DisplayPort cable.
1. Connect keyboard/mouse and monitor
Connect your keyboard, mouse and monitor to QTrobot. If your QTrobot has a USB-C port, use the provided USB-C extension hub to connect them; if it has standard USB and DisplayPort, use the provided DisplayPort-to-HDMI cable for the monitor and the USB ports for the keyboard and mouse.
2. Turn QTrobot on
To turn QTrobot on, plug in its power supply. This starts the boot process, and QTrobot is ready in under a minute: the face lights up and the motors move to their home position.
To turn QTrobot off, press the power button on the back of QTrobot; this shuts down both QTRP and QTPC. Wait for the face screen (which usually turns blue before shutting down) to go off completely, then unplug the power supply. Always unplug QTrobot when it's off.
- Only use the power supply provided with your QTrobot.
- Always unplug QTrobot when it's off.
3. Wait for QTPC to boot
QTPC may take a little longer than QTRP to boot, so give it a moment. Once it's up, you'll see its Ubuntu desktop, ready to use like any standard Linux development machine.
You're now ready for coding. In most cases you'll also want internet access; the next section walks you through connecting QTrobot to your network.
Connect to the internet
QTRP and QTPC talk to each other over a fixed internal link: QTPC is 10.231.0.1 and QTRP is 10.231.0.2. QTRP's own Wi-Fi radio is no longer used and stays disabled; all networking, including internet access, now goes through QTPC.
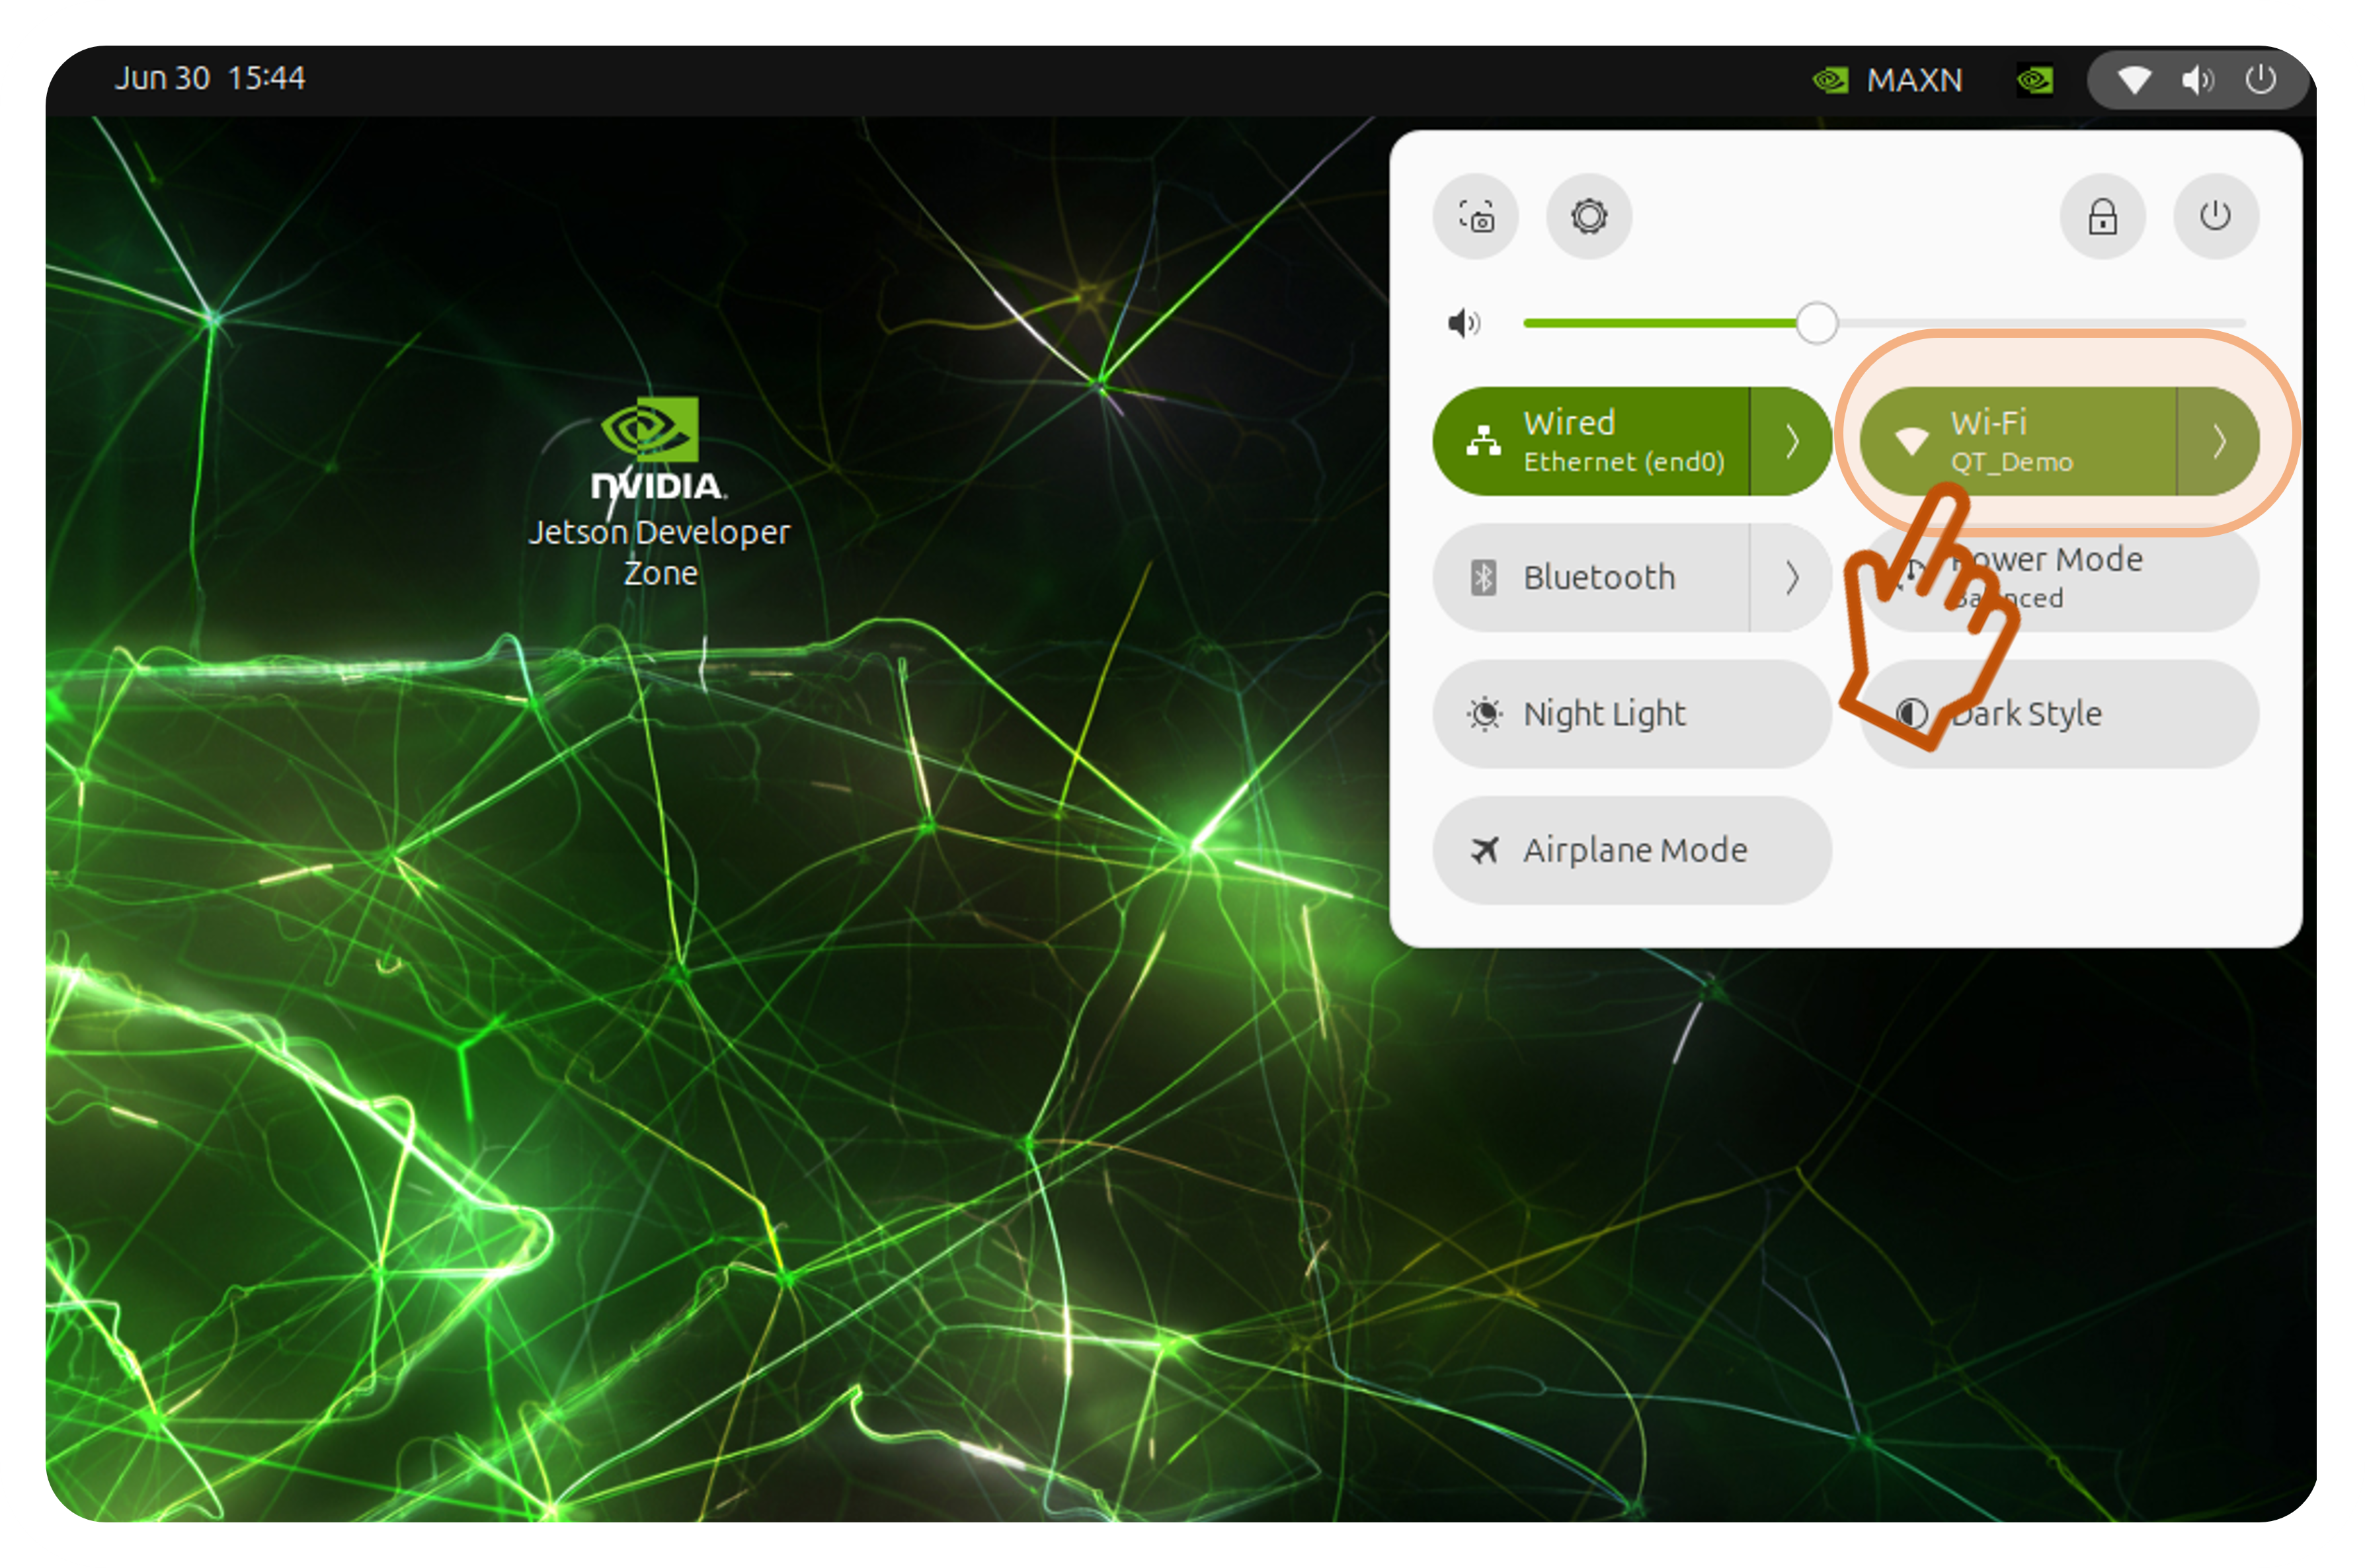
This is a deliberate simplification: connecting QTrobot to the internet is now exactly like connecting any Ubuntu desktop PC. Open the network settings on QTPC's desktop and connect to your Wi-Fi or plug in an ethernet cable, the same way you would on any laptop:
Because this uses QTPC's standard NetworkManager, it also works out of the box with more complex networks that require username/password or certificate-based authentication (WPA2-Enterprise, EAP-TLS, etc.).
Once QTPC has internet access, it automatically shares it with QTRP over the internal 10.231.0.x link; there's nothing else to configure.
Accessing QTRP
QTRP is reachable by hostname from a terminal on QTPC:
ssh qtrp
# password: qtrobot
In day-to-day use you shouldn't need this much: QTPC is your development playground, and QTRP is not meant for coding or running your applications. The only time you'd normally touch QTRP is for low-level configuration of system services such as qtrobot-service-hub, which is covered separately where relevant.
Start coding
The fastest way to get a feel for the stack is the Python SDK:
mkdir ~/example
cd ~/example
python -m venv .venv
source .venv/bin/activate

pip install luxai-robot
from luxai.robot.core import Robot

robot = Robot.connect_zmq(robot_id="QTRD000123")
robot.tts.say_text("Hello, I am QTrobot.")
QTrobot V3 supports three programming interfaces — pick whichever matches your stack: