QTrobot Vision and 3D Camera
QTrobot has an integrated 3D camera in the head. It is a Intel® RealSense™ Depth Camera D455. It is connected to NUC mini PC (QTPC) via USB-C port and it is open for developers to configure and use it.

Software Interfaces
Like any other standard camera, the QTrobot 3D camera is an standard Linux video capture device. Bellow you can see the example output of v4l2-ctl --list-devices command which lists all video capture devices in QTPC:
Intel(R) RealSense(TM) 430: Int (usb-0000:00:14.0-4):
        /dev/video0
        /dev/video1
        /dev/video2
        /dev/video3
        /dev/video4
        /dev/video5
QTrobot comes with the pre-installed software for human 3D body and facial tracking, image recognition and ros usb camera driver. This is installed on QTPC, because direct access to the 3D camera is required.
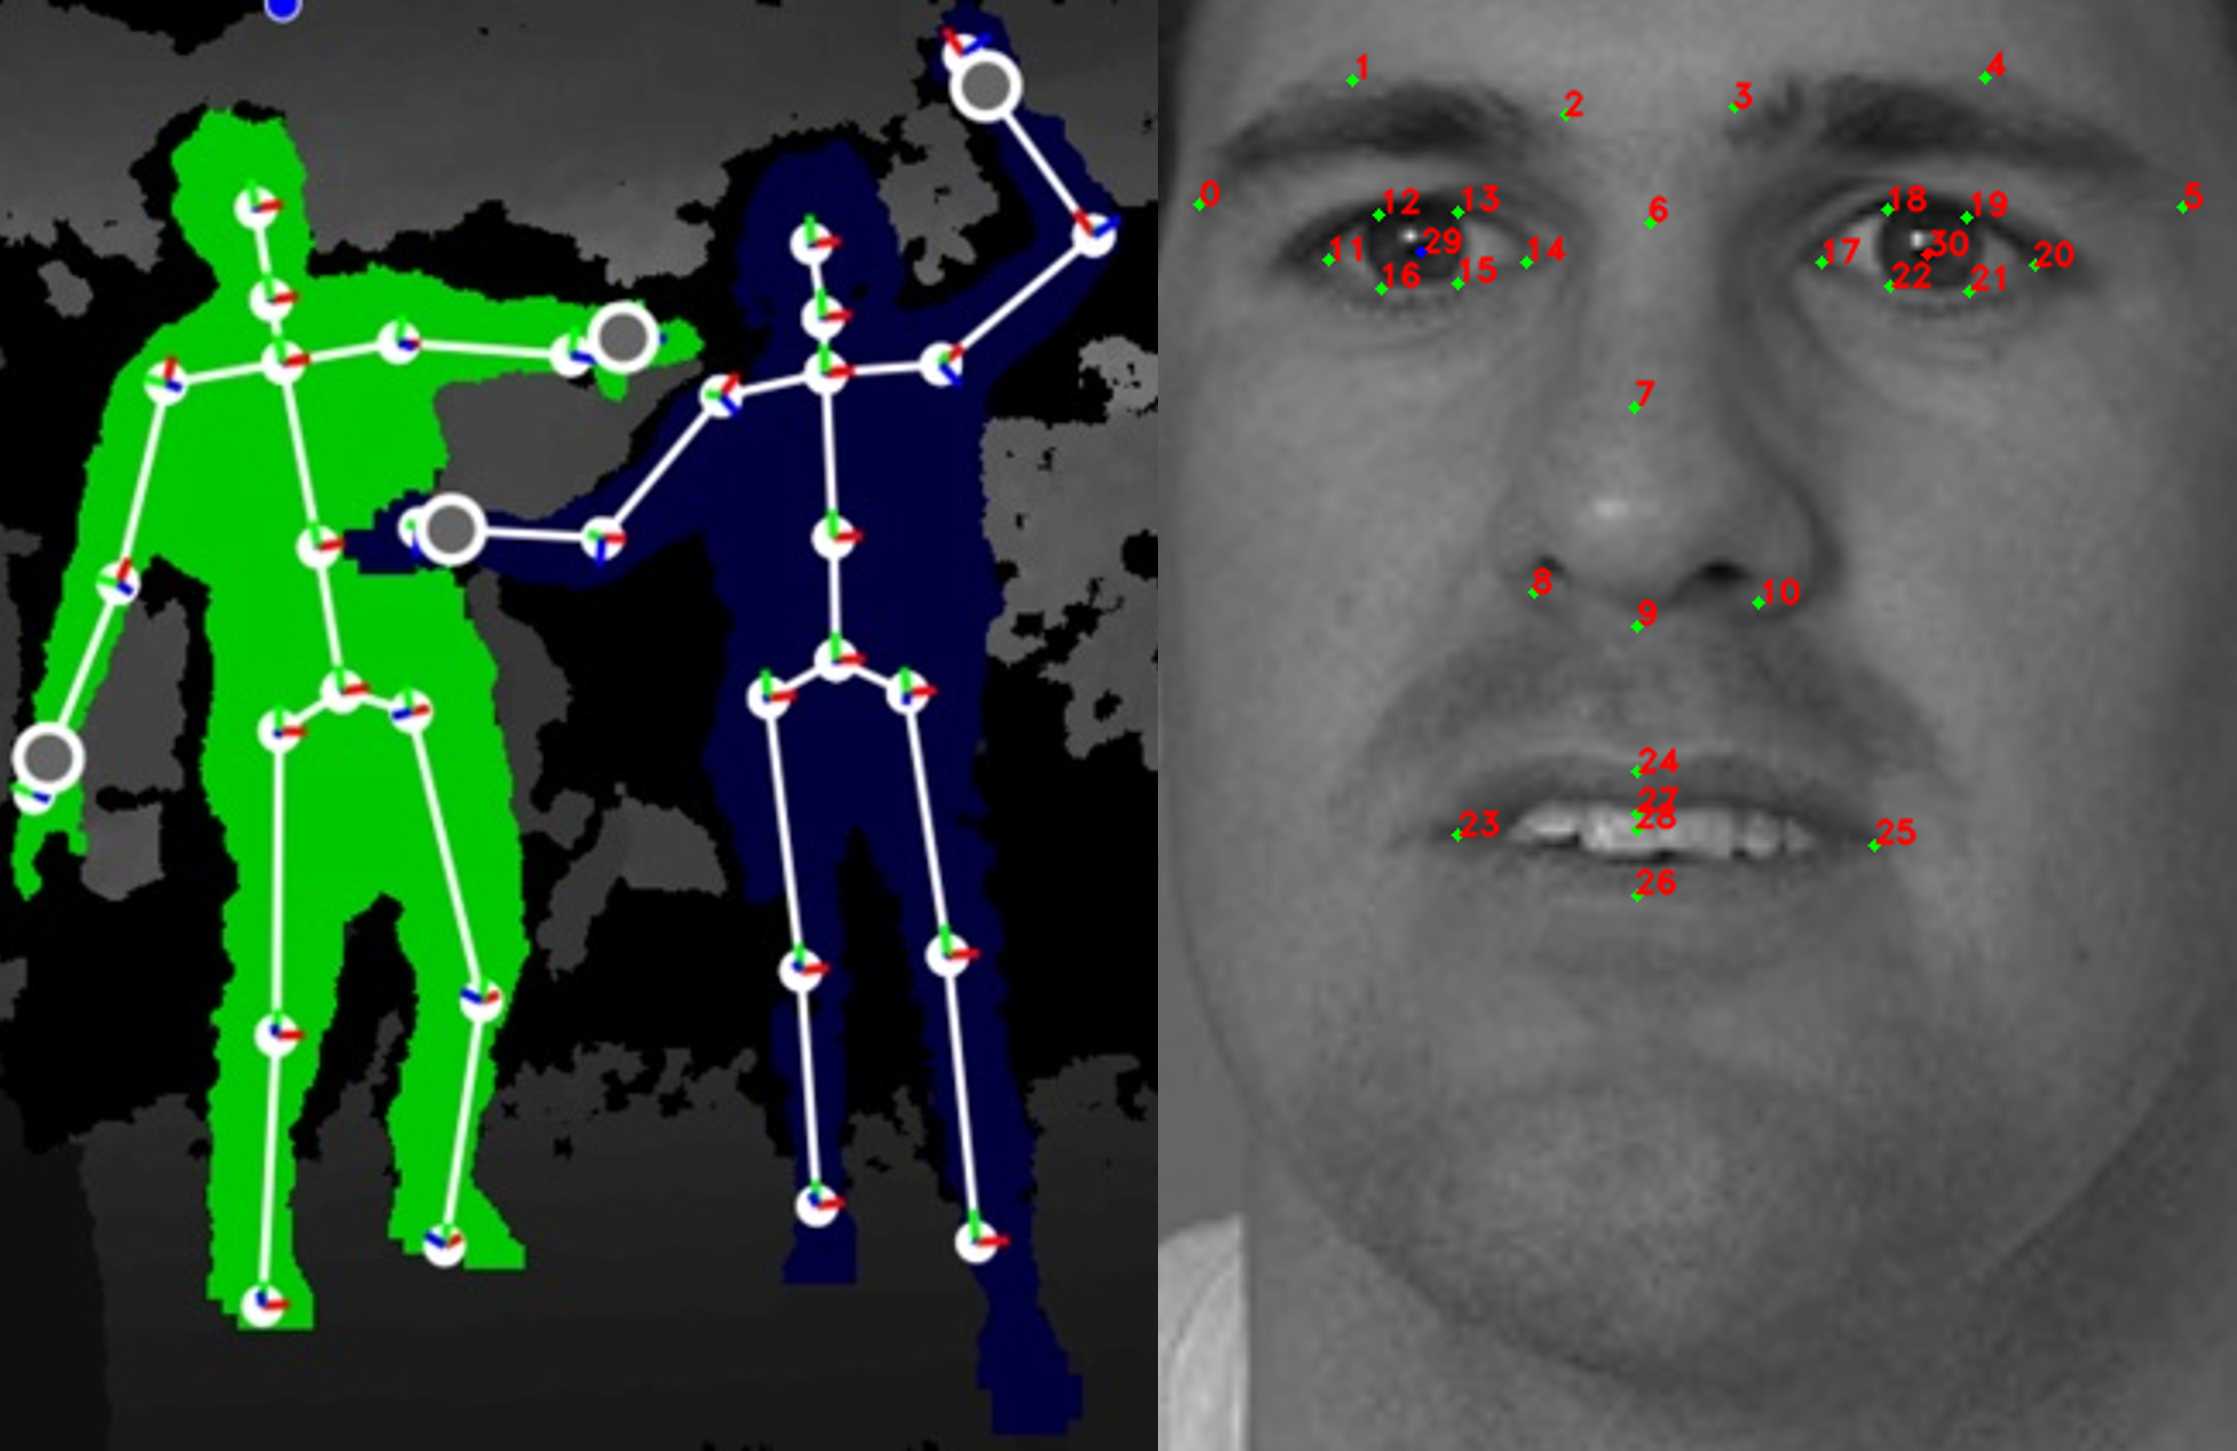
- qt_nuitrack_app: implements different human 3D body and facial tracking including human full body skeleton, hands position and gestures, facial and emotion recognition using Nuitrack SDK.
- find_object_2d: implements object recognition
- usb_cam: ROS camera driver for V4L USB Cameras
Human 3D body and facial tracking
QTrobot uses qt_nuitrack_app for human 3D body and facial tracking. The qt_nuitrack_app is installed in QTPC ~/catkin_ws and it is running by default.
The qt_nuitrack_app uses Nuitrack™ which is a 3D tracking middleware developed by 3DiVi Inc. This is a solution for skeleton tracking and gesture recognition that enables capabilities of Natural User Interface (NUI). Nuitrack™ framework is multi-language and cross-platform. Nuitrack™ APIs include the set of interfaces for developing applications, which utilize Natural Interaction.
| Key Features | Application Areas | |
|---|---|---|
|
|  |
The qt_nuitrack_app extracts data from Nuitrack SDK and publishes human skeletons, hands, gestures and faces information to its ROS topics:
/qt_nuitrack_app/faces
/qt_nuitrack_app/gestures
/qt_nuitrack_app/hands
/qt_nuitrack_app/skeletons
Using QT Nuitrack interface from terminal
Like many other ROS topics, you can subscribe to /qt_nuitrack_app/gestures to read detected gesture.
rostopic echo /qt_nuitrack_app/gestures
Stand in front of QTrobot and do one of following gestures SWIPE UP, SWIPE DOWN, SWIPE LEFT or SWIPE RIGHT.
If the gesture is detected you will see something like this example:
[INFO] [1629900965.371938]: gestures:
  -
    id: 2
    name: "SWIPE UP"
Using QT Nuitrack interface from code
Take a look at our Python Human gesture detection tutorial to learn how to read gesture data from qt_nuitrack_app from a Python code. Here is a snippet:
from qt_nuitrack_app.msg import Gestures

def gesture_callback(msg):
    if msg.gestures[0].name == "SWIPE UP":
        print("I got: %s", msg.gestures[0].name)

rospy.Subscriber('/qt_nuitrack_app/gestures', Gestures, gesture_callback)
We have also other python tutorials using qt_nuitrack_app:
Using QT Nuitrack interface from visual studio blocks
QTrobot studio offers very flexible and powerful blocks to handle complex ROS messages and interact with other publishers, subscribers and services. You can follow Using ROS blocks tutorial to learn about ROS blocs.
Take a look at our Create an interactive memory game using human gestures tutorials to learn how to call qt_nuitrack_app using QTrobot visual studio blocks.
Tips for better skeleton and facial emotion recognition
Use QTrobot in a fairly well luminated environment. Intel Realsense 3D cameras are design for mostly indoor applications and in general they are sensitive to lights.When using QTrobot with camera applications, do not put the robot against window or any other source of light (i.e. robot should not look towards window). That may create blurry and unclear camera image and decreases performance of 3D software.
Stay in front of the QTrobot camera so that camera can see most parts of your body (around 1.5m-2m away from the robot). For skeletong, gesture, facial expression, etc. to work properly, nuitrack SDK requires first to see almost whole body (standing position) to detect it first. then you can move closer if it's needed.
Similarly, to have facial data recognized by
/qt_nuitrack_app/faces, first almost your whole body should be visible to QTrobot's camera. If you are in sitting position, just stand up and stay few steps away from QTrobot so that it can see your whole body. After detecting your face, you may walk closer and even sit in front of its camera.Image recognition with QTrobot
QTrobot uses ROS find_object_2d module for easy and flexible image recognition. Using a camera, objects are detected and published on a ROS topic with ID and position. Take a look at our Create an interactive memory game using cards tutorial to learn how to read data from find_objects_2d.
Using QTrobot's camera, the find_object_2d simply detect whatever images that are in ~/robot/data/images folder on QTPC. For example, we can use the following images. These images already exist in the corresponding folder to be recognized by find_object_2d.
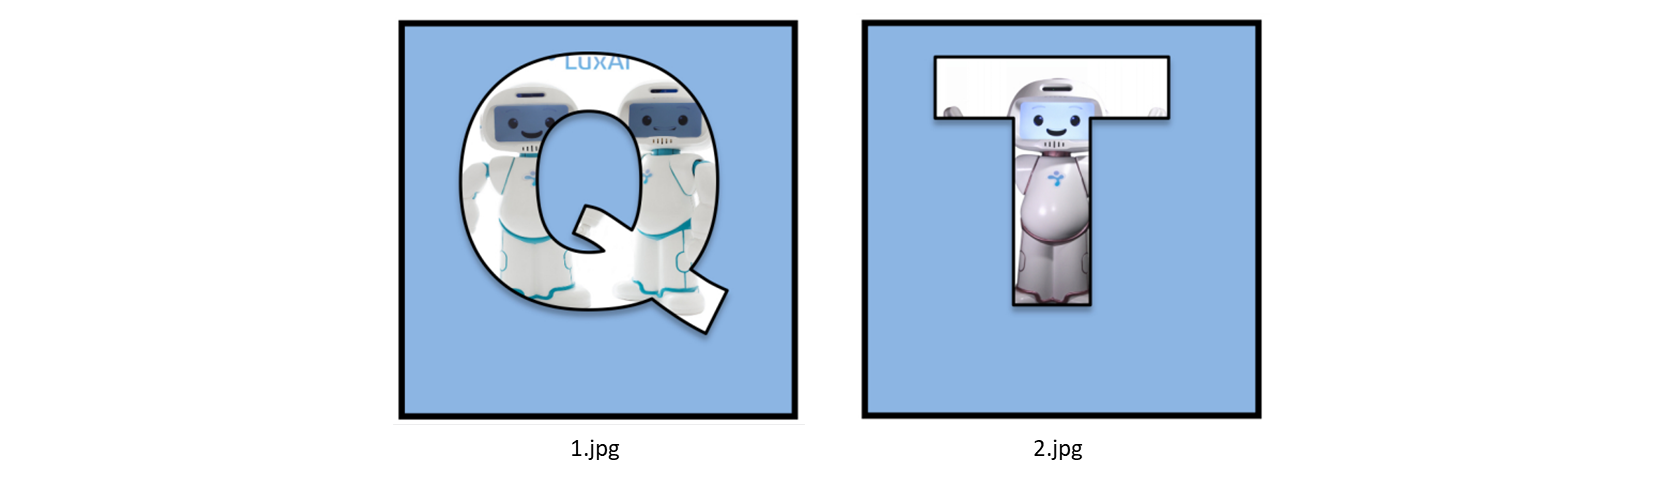
If we show one of the above card to QTrobot, the find_object_2d recognizes it and publishes the corresponding id (number in the filename) along with other information to /find_object/objects topic. The topic uses a message of standard type std_msgs/Float32MultiArray. The first element in the list is the id of the image which is of our interest for this scenario.
Like many other ROS topics, you can subscribe to /find_object/objects to read detected objects.
rostopic echo /find_object/objects
For example, if we show the T card image (i.e 2.jpg), the following message will be published. The first element in data field (2.0) is the id of the 2.jpg image.
layout:
  dim: []
  data_offset: 0
data: [2.0, 553.0, 553.0, 0.582885205745697, -0.03982475772500038, ...
---
Detecting a custom object
Simply add images to ~/robot/data/images folder on QTPC and re-run find_object_2d. Subscribe to the /find_object/objects topic and read the data.
Take a look at this example how to read data from find_object_2d from a Python code. Here is a snippet:
from std_msgs.msg import Float32MultiArray

def image_callback(msg):
    print(msg.data)

rospy.Subscriber('/find_object/objects', Float32MultiArray, image_callback)
ROS find_object_2d is already pre-installed on QTPC. To enable it you need to add run_script start_find_object.sh; to the ~/robot/autostart/autostart_screens.sh. It needs to access /camera/color/image_raw topic to work.
Tips for better object recognition
When using QTrobot with camera applications such as image recogntion, do not put the robot against window or any other source of light (i.e. robot should not look towards window light). That may create blurry and unclear camera image and decreases performance of 3D software.Print your image to be recognized on fairly big and visible card/paper. Don no use very thin paper (transparent) or print the image very small and invisible.
Show the image fully and clearly to the robot. move the card/paper slightly back and forward in front of the QTrobot camera to find the idle distance with respect to your image card size.
Do not use very simple image such as simply colored circle or other simple shapes. By default the
find_object_2d uses image Detectors/descriptors engine which requires images with lots of features and details in that. In simple words, more complex images are better for this type of recognition. You can learn more about Find Object image recognition here. 15.jpg and place them in ~/robot/data/images folder on QTPC. Do not forget to relaunch the find_object_2d or reboot the robot to load your images.
How to use Intel RealSense SDK with QTrobot
The Intel® RealSense™ SDK 2.0 is a cross-platform library for Intel® RealSense™ depth cameras, which allows depth and color streaming, and provides intrinsic and extrinsic calibration information. The library also offers synthetic streams (pointcloud, depth aligned to color and vise-versa), and a built-in support for record and playback of streaming sessions.
The SDK comes with:
- Intel® RealSense™ Viewer: With this application, you can quickly access your Intel® RealSense™ Depth Camera to view the depth stream, visualize point clouds, record and playback streams, configure your camera settings, modify advanced controls, enable depth visualization and post processing and much more.
- Depth Quality Tool: This application allows you to test the camera’s depth quality, including: standard deviation from plane fit, normalized RMS – the subpixel accuracy, distance accuracy and fill rate. You should be able to easily get and interpret several of the depth quality metrics and record and save the data for offline analysis.
- Debug Tools: Device enumeration, FW logger, etc as can be seen at the tools directory
- Code Samples: These simple examples demonstrate how to easily use the SDK to include code snippets that access the camera into your applications. Check some of the C++ examples including capture, pointcloud and more and basic C examples
- Wrappers: Python, C#/.NET, Node.js API, as well as integration with the following 3rd-party technologies: ROS, ROS2, LabVIEW, OpenCV, PCL, Unity, Matlab, OpenNI, UnrealEngine4 and more to come.
You can follow this instalation process for QTPC. Most of these interfaces/softwares exclusively need access to the camera. That means, for example, one should first stop qt_nuitrack_app or any other running software that is using camera, and run its own software.
To disable the qt_nuitrack_app you need to edit autostart script (~/robot/autostart/autostart_screens.sh) on QTPC, which runs on boot of the QTrobot.
nano ~/robot/autostart/autostart_screens.sh
and comment this line below:
#run_script "start_qt_nuitrack_app.sh"
After that on every next reboot of the QTrobot qt_nuitrack_app will not run by default.
How to use standard ROS usb_cam with QTrobot
ROS usb_cam is ROS driver for generic USB cameras. It uses libusb_cam and publishes images as type of sensor_msgs::Image and uses image_transport library to allow compressed image transport.
The usb_cam publishes raw image data from camera to /camera/color/image_raw topic. The message type is sensor_msgs/Image:
Header header        # Header timestamp, etc
uint32 height         # image height, that is, number of rows
uint32 width          # image width, that is, number of columns
string encoding       # Encoding of pixels -- channel meaning, ordering, size
uint8 is_bigendian    # is this data bigendian?
uint32 step           # Full row length in bytes
uint8[] data          # actual matrix data, size is (step * rows)
Some cameras (particularly webcams) output their image data already in JPEG format (compressed image). When running the usb_cam you can read also /camera/color/image_raw/compressed which publises compressed image format sensor_msgs/CompressedImage:
Header header        # Header timestamp, etc
string format        # Specifies the format of the data (jpeg, png)
uint8[] data         # Compressed image buffer
ROS usb_cam is already pre-installed on QTPC. To enable it you need to add run_script start_ros_usb_cam.sh; to the ~/robot/autostart/autostart_screens.sh and disable the other interfaces that are using the camera.